
One of the biggest advantages of Microsoft Teams is that it’s an all-in-one tool, where you can chat, have meetings, share files, collaborate and do much more. But that also implies a lot of notifications, and depending on how to use them, notifications can be either a blessing or a curse.
No one wants to wake up to 100+ notifications in Teams or spend an hour after their lunch break figuring out what the notifications are about. But truth be told, they constantly save the day – whether it’s a reminder about a meeting you had totally forgotten about or a @mention that brings your attention to an important matter.
If you’ve found yourself in a similar “can’t live with them, can’t live without them” situation then you’re in the right place. In this article, we will help you understand the types of notifications in Microsoft Teams and how to configure them based on your needs and wants.
What you need to know about notifications in Microsoft Teams
For your convenience, we’ve identified 5 important things that you need to know about Microsoft Teams notifications that will allow you to customize them more efficiently.
#1 Where should I get started?

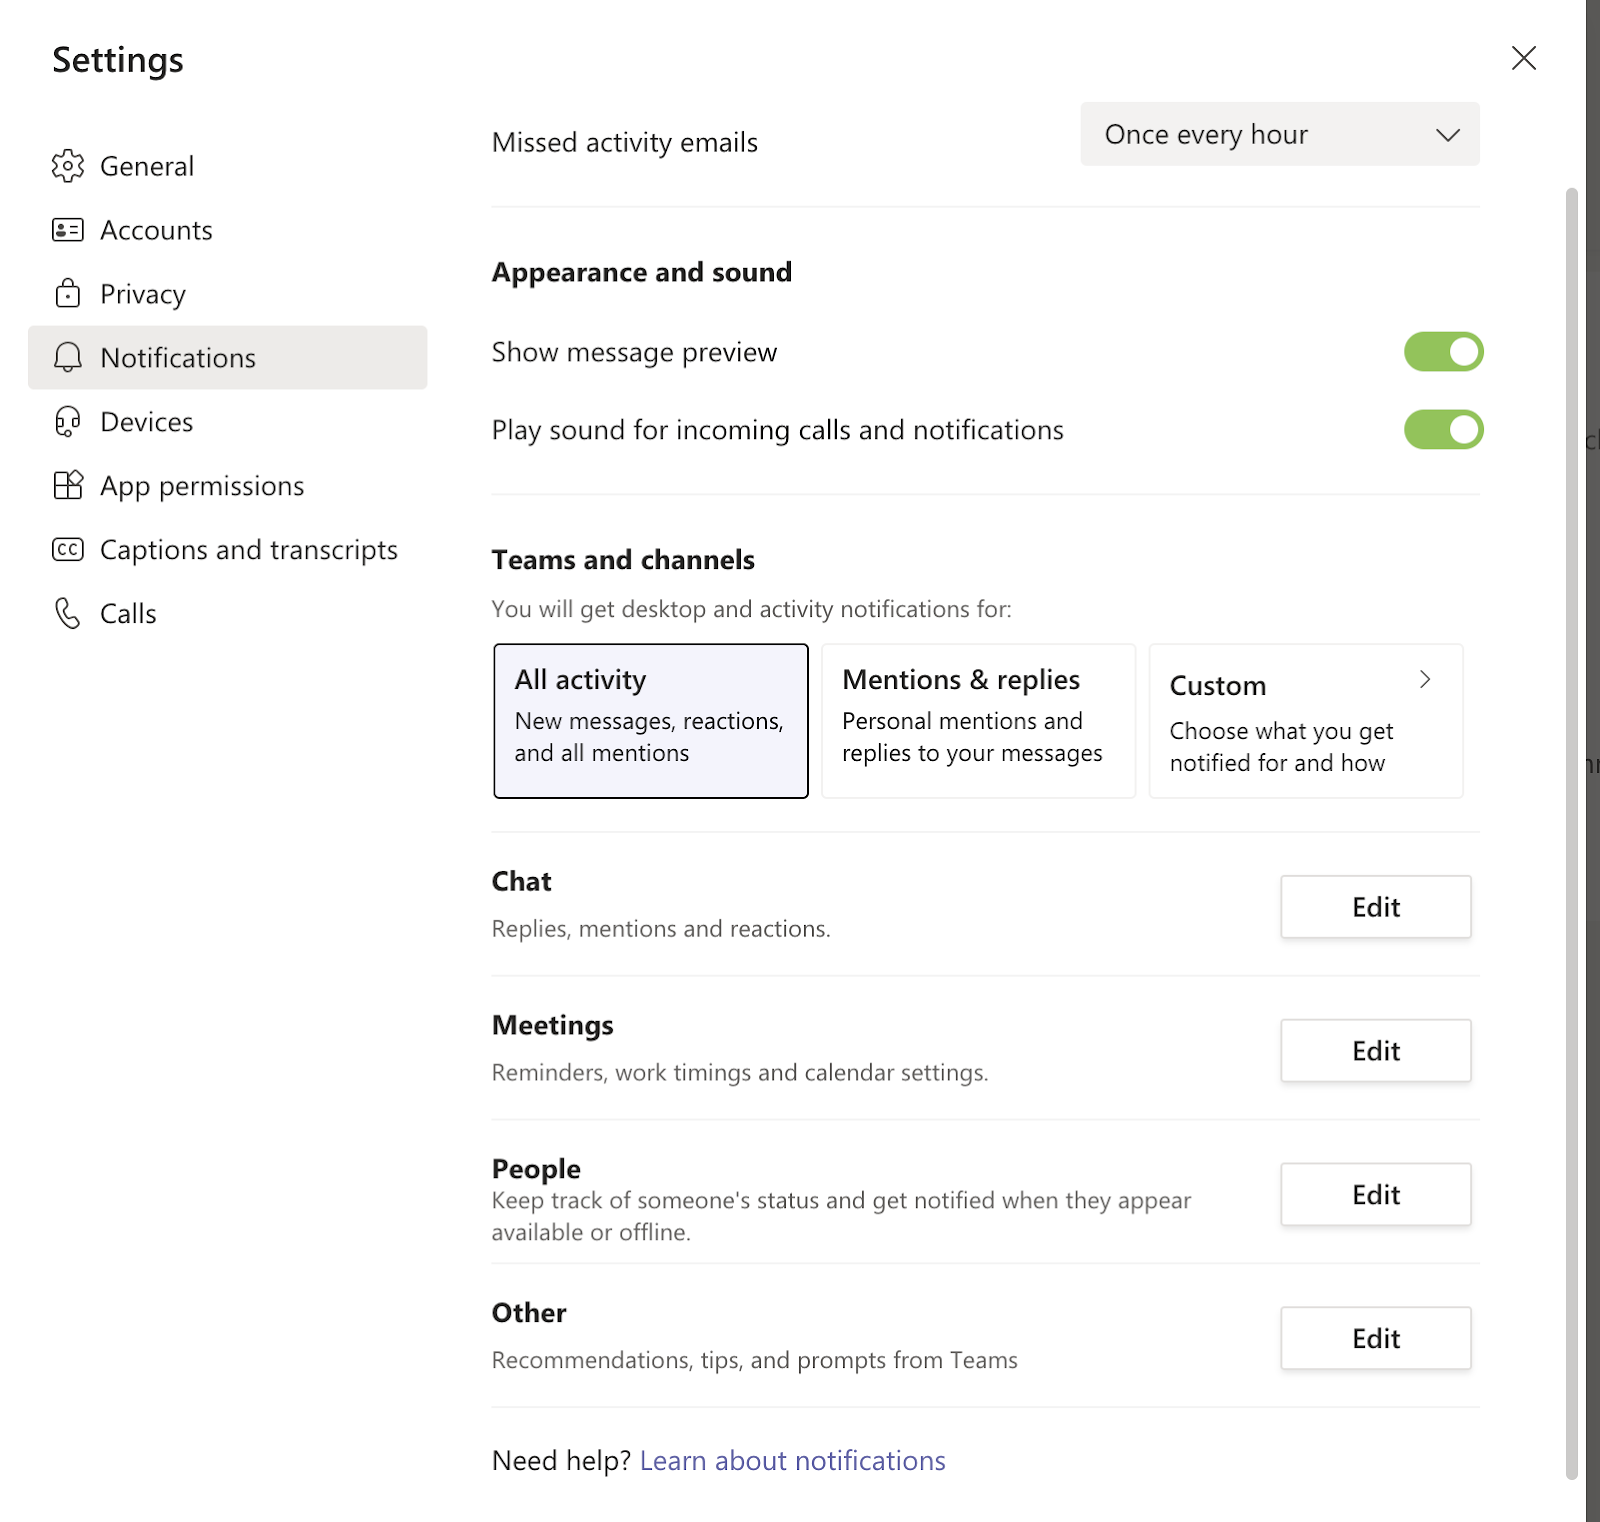
The Holy Grail of Microsoft Teams notifications is the feed, which is the little Activity bell icon located in the upper left corner of the app. If you click on the Settings icon, it’ll directly take you to the Notification Settings. You can also find the Notification Settings by selecting the three dots on the upper right corner (next to your profile picture), then Settings → Notifications.
You should also familiarize yourself with the UX of this Setting section since this is where you’ll be doing the customization of your notifications.
#2 The types of notification settings in Microsoft Teams
The management of Microsoft Teams notifications start from understanding what kind of notifications you receive. Microsoft Teams sends you four different notification settings:
- Banner
This is the most common type of notification. It’s the banner message pop-up that appears in the lower right corner of your desktop.
- Banner and feed
If this setting is enabled, you will not only get a pop-up message, but also see it in your feed. Like all other apps and tools, the activity bell will have a red number on it that indicates how many notifications you have, so there is no way you’ll miss them.
- Only show in feed
This means that the notifications will be compiled and visible only in your feed.
- Off
This one is rather self-explanatory, and a tempting choice for many Microsoft Teams users. If you enable the Off setting, you won’t receive any notifications – neither as a pop-up nor in your feed.
#3 The default notification settings
Microsoft Teams has different default notification settings for different activities, and not all settings are available for all activities.
For instance, the default settings for Chats are as follows:
- @mentions – banner and feed
- Replies – banner
- Likes and reactions – banner and feed
You can’t opt for “Off” for the @mentions, but you can turn off the Replies and Likes and Reactions.
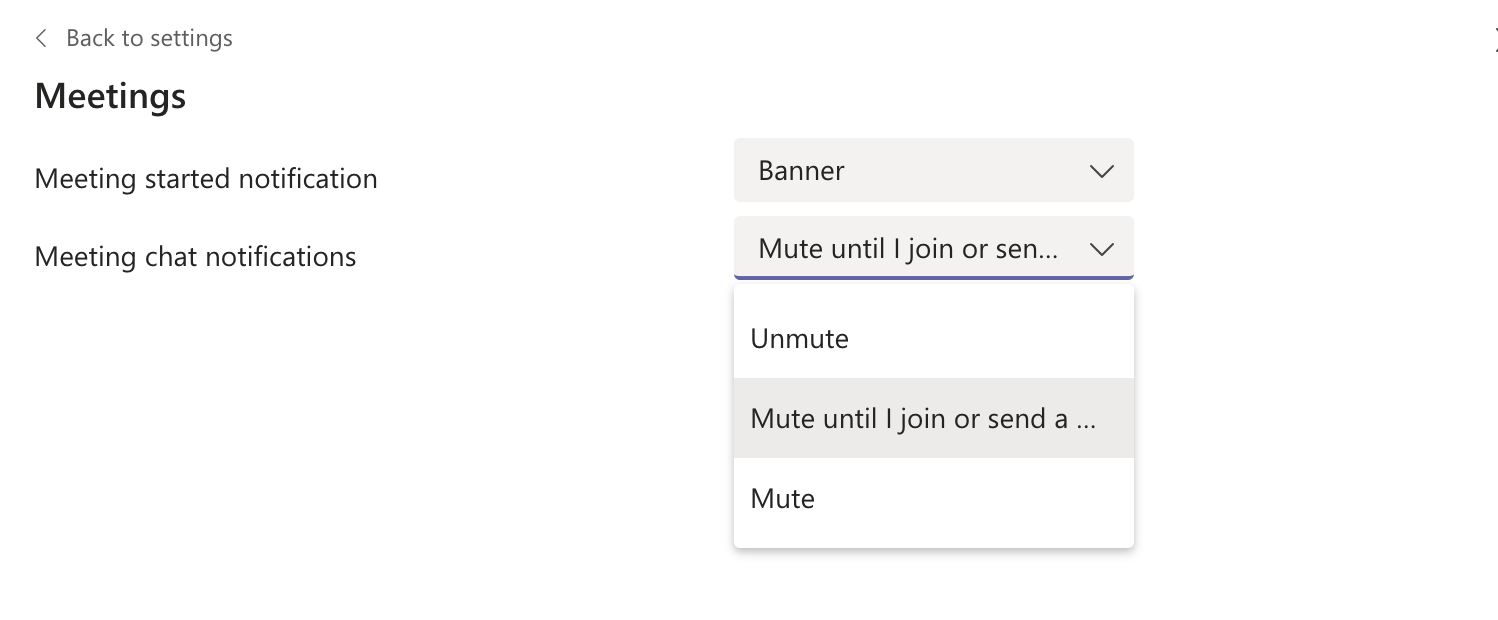
If you go to Meetings instead of Chat, you’ll see that the notification settings for this category are different.
#4 Email, appearance, and sound
Besides the Chat, Meetings, People and Other, there are two other important sections that are often overlooked – Email and Appearance and sound.
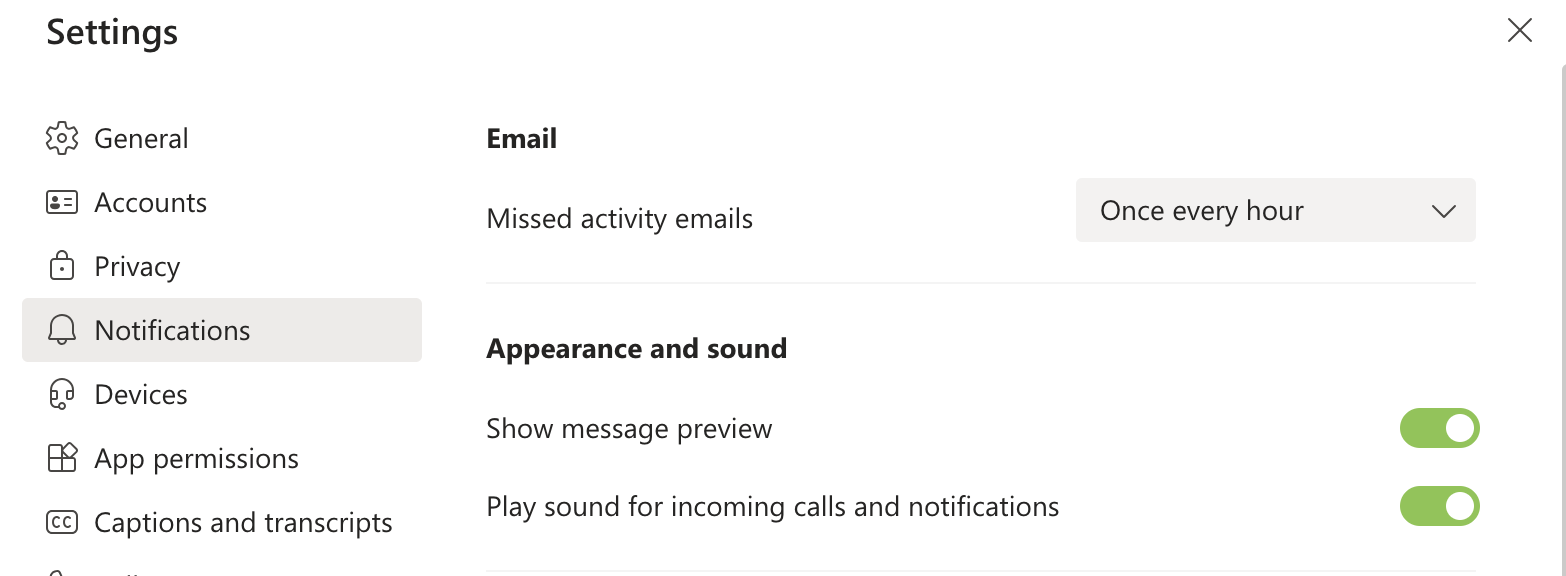
In addition to sending you a notification via pop-ups or the feed, Microsoft Teams also sends you emails about missed activities. The default setting for this is Once every hour but you can change it to one of the following:
- As soon as possible
- Once every 10 minutes
- Once every 8 hours
- Daily
- Off
You receive the emails to the account you used when registering in Teams.
In this section, you can also disable previews and sounds for incoming calls and notifications.
#5 Channels have notifications too
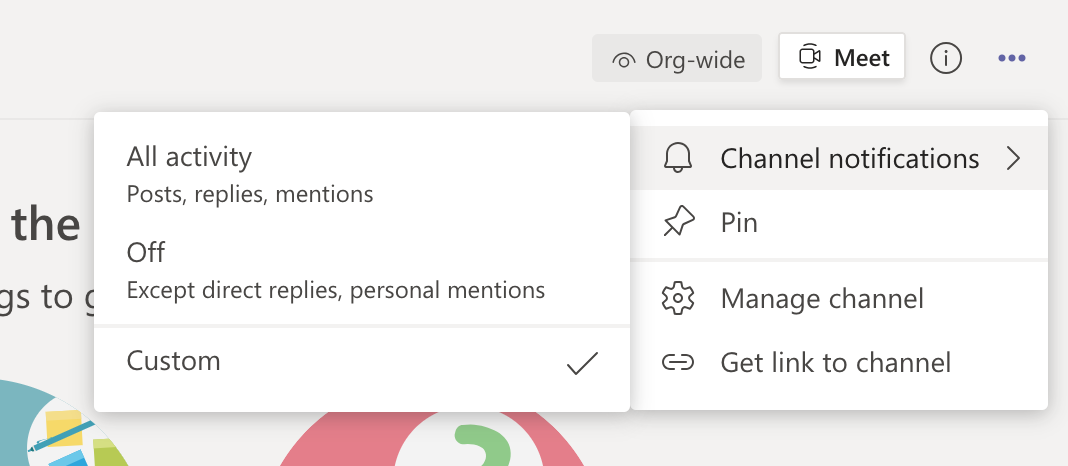
So far we’ve been talking about the notifications you receive team-wide, but there are also Channel notifications. By default, Microsoft Teams will show you the three most active channels in that particular team and send notifications. The three dots on the right top corner next to the Org-wide and Meet buttons will give you an overview of Channel notifications settings, and as you can see, they can be customized too.
Now, onto the actual customization of the notifications.
How to properly adjust the notification settings in Microsoft Teams
As already mentioned, all the customization magic of the team notifications happens in the Settings tab. Quick reminder – top left corner Activity → Settings.
Anything and everything in this section can be customized. Some settings are simply on or off, so you can either enable or disable them. We recommend starting from Missed activity emails since it can be the most overwhelming. If you leave it on Once every hour, your inbox will get very full very quickly. So, if you want to avoid that or on the contrary, you want to receive more frequent email notifications then choose the relevant setting.
Appearance and sound is a rather straight-forward choice, so moving on to Teams and channels. We’ve already briefly talked about this section when discussing the various settings that Teams offers. Here is a little shortcut that will help you easily customize this section. Instead of going one-by-one to Chat, Meetings, People and then Other, simply click on Custom, and you’ll be able to play with the most common notifications across teams and channels.
Desktop vs. app
Most Microsoft Teams users have it installed on their phones as well. Notifications are different on mobile, so here is a brief guide on how to customize those as well. When you first install Teams on your phone, whether you’re using iOS or Android, your phone will most probably ask for permission to send you notifications. Allowing and not allowing is one way of managing Microsoft Teams mobile notifications. If you do allow notifications, you can then customize them within the app.
Here is how you do it – Click on the profile icon on the top left corner and choose Notifications. You can play around with these settings which are mostly Enable vs. Disable.

Automated notification flow via Microsoft Power Automate
By investing a little more time, you can also create an automated notification flow using Microsoft Power Automate. It allows you to create your very own notification flow which will go either to your inbox or Microsoft Flow mobile app.
Power Automate has a number of different templates and you can filter through them by searching Teams or notifications. You can learn more about this solution here.
Final thoughts
You just need to dedicate a maximum of an hour of your time to configure the Microsoft Teams notifications, and it will boost your productivity and spare you the hassle of constantly going through the feed and trying to understand what is important and what is not.
If your priorities change, you can always go back and make some changes to your custom notification settings.